Infinity Field: Difference between revisions
No edit summary |
No edit summary |
||
| Line 6: | Line 6: | ||
|TITLE-OUT= | |TITLE-OUT= | ||
}} | }} | ||
Whilte the ATUM Research Institute was working on the ''Infinity Project'' for efficient space travel and exploration, the warp station was hacked by a remnant Shrines' covert unit. Soon after it was hacked, access to unknown areas were discovered. This discovery lead to the deployment of pilots to investigate and secure these areas, unaware of what they will be faced against. | |||
<br><br> | |||
__TOC__ | |||
<br> | <br> | ||
You can exchange your Orbs for special items in [[Infinity Field Vendor]]. | * The Infinity Field have different restrictions such as limited daily access or 60 level requirement. | ||
* When you want to leave Infinity Field area, press <code>B + Enter</code> to stop your gear and press the Resign button to leave Infinity Field. | |||
* When bidding, the keyboard button <code>Y</code> / <code>N</code> can also be used instead of mouse click to decide your bid. | |||
* You can exchange your Orbs for special items in [[Infinity Field Vendor]]. | |||
==Areas== | ==Areas== | ||
{{ | Currently Infinity Field offers thre different areas. | ||
{{Toggle|Title= '''Kreacian Holy Lands'''}} | |||
[[File:Kreacian Holy Land Main.png|Kreacian Holy Land]] | |||
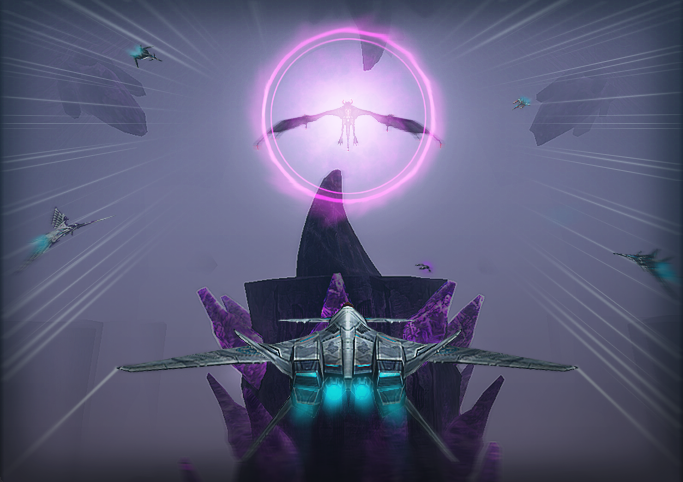
<p>The Kreasian Holy Lands is a place where a warp malfuncion sent our pilots. It is a land with sentient monsters. Who will be the last one to stand? The Kreacia who will eliminate all who defile their home or the brave pilots.</p> | |||
'''Objective:''' Players must defeat a series of five dragons. | |||
<br><br> | |||
In this zone, Infinity Progress time decreases by 3 minutes in every time of death. Time limist: 2hours. | |||
<br><br> | |||
'''List of bosses ''(appearing in order)''''' | |||
---- | |||
* Holykeeper | |||
* Holywalker | |||
* Blesskrea | |||
* Megakeeper | |||
* Ultima Kreacia | |||
{{/Toggle}} | |||
{{Toggle|Title= '''The Hydrogen Driver'''}} | |||
[[File:The Hydrogen Driver Main.png|The Hydrogen Driver]] | |||
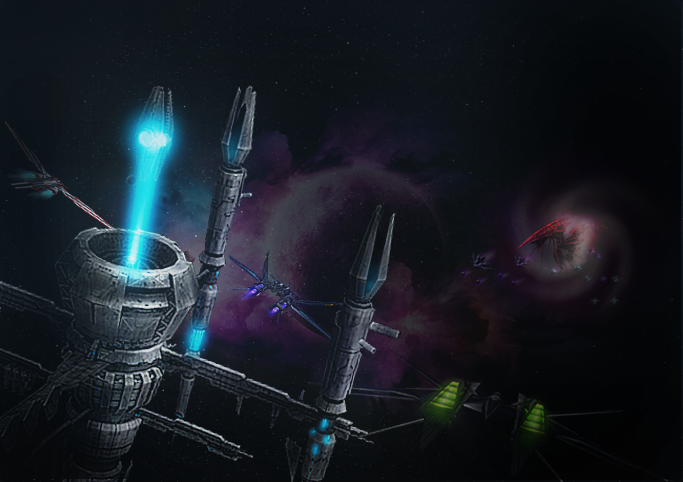
<p>The Decan secret weapon, the Hydrogen Driver, is attacking Shrine Military planets. Protect it at all costs!</p> | |||
'''Objective:''' Players must defend the Hydrogen Driver secret weapon from the attacking Shrine enemies [10 steps]. | |||
<br><br> | |||
Due to how the mobs are spawned it takes a minimum of 20 minutes to complete. Time limit: 30min. | |||
<br><br> | |||
'''List of steps ''(appearing in order) with spawn sectors''''' | |||
---- | |||
'''STEP 1''' | |||
* s8 - Mega Naros | |||
* s8 - Griph | |||
'''STEP 2''' | |||
* s4 - Hydro M-Gear | |||
* s4 - Schill interceptor | |||
'''STEP 3''' | |||
* s2- Fllaro | |||
* s2 - Garp | |||
* s9 - Simpler | |||
'''STEP 4''' | |||
* s6 - Hate | |||
* s3/s9 - Fate | |||
* s1 - Arcaous | |||
'''STEP 5''' | |||
* s2 - Seifer | |||
* s9 - Bishop Blue | |||
'''STEP 6''' | |||
* s7 - Sand Dragon | |||
* s1 - Muspell | |||
* s9 - Slayer | |||
'''Backups from Top''' | |||
* Hydro Fighter | |||
'''STEP 7''' | |||
* s3 - Cassini | |||
* s1 - Hydro Juggernaut | |||
'''STEP 8''' | |||
* s2/s4/s6/s8 - Sleipnir | |||
* s4/s6 - Quintis | |||
* s2 - Bishop black | |||
'''STEP 9''' | |||
* s9/s8 - Graim | |||
* s3 - Carrier | |||
* s6 - Bishop red | |||
'''STEP 10''' | |||
* s8/s4 - Forneus | |||
* s4 - Hydro Sheep/Sleipnir | |||
* s2 - Fiegeralla | |||
* s8/s9 - Graim | |||
* s8 - Calzaghe | |||
<br> | |||
'''List of other mobs''' | |||
---- | |||
* Bifrons Beta - when close to this mob it heals 250 shield and energy. | |||
* Egma | |||
* Schill Interceptor | |||
* Asteroid | |||
{{/Toggle}} | |||
{{Toggle|Title= '''Survival Abyss'''}} | |||
[[File:Survival Abyss Main.png|Survival Abyss]] | |||
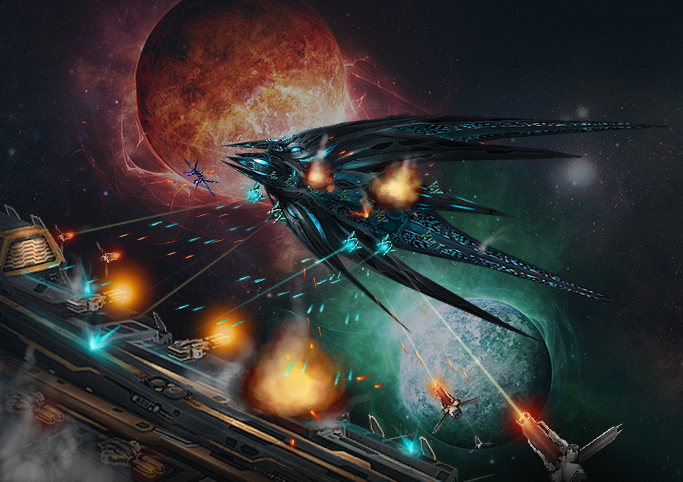
<p>SHADE, the Mothership of Shrine, is attacking the Osiris Mothership. Take the warp to the battle field and destroy SHADE!</p> | |||
'''Objective:''' Players must defend the allied Mothership Osiris and destroy the attacking Shrine Mothership known as SHADE [5 missions]. | |||
<br><br> | |||
Time limit: 30min. | |||
<br><br> | |||
'''List of missions ''(appearing in order)''''' | |||
---- | |||
'''Mission 1''' | |||
* Destroy all SHADE's Main Blasters | |||
'''Mission 2''' | |||
* Blow up SHADE's Airstrip | |||
'''Mission 3''' | |||
* Decimate the enemy gears | |||
'''Mission 4''' | |||
* Destroy SHADE's Radar | |||
'''Mission 5''' | |||
* Destroy SHADE's Engine Shield, then SHADE's Engine | |||
'''Mission 5 ''(Optional)''''' | |||
* Destroy the Escape Pods | |||
{{/Toggle}} | |||
==Difficulty== | ==Difficulty== | ||
{ | After creating a waiting room, you can adjust step difficulty level, from minimum 0 (easiest), to maximum of 50 (hardest). Default step difficulty level is 25. | ||
<br> | |||
Higher levels include more difficult mobs and bosses, but offer better experience and rewards. | |||
<br> | |||
<br> | |||
{| class="IF-DifficultyTable" | |||
! Level | |||
! Experience | |||
! Probability | |||
! Item Amount | |||
|- | |||
| 1 || +21% || +21% || +21% | |||
|- | |||
| 2 || +24% || +24% || +24% | |||
|- | |||
| 3 || +27% || +27% || +27% | |||
|- | |||
| 4 || +30% || +30% || +30% | |||
|- | |||
| 5 || +33% || +33% || +33% | |||
|- | |||
| 6 || +36% || +36% || +36% | |||
|- | |||
| 7 || +39% || +39% || +39% | |||
|- | |||
| 8 || +42% || +42% || +42% | |||
|- | |||
| 9 || +45% || +45% || +45% | |||
|- | |||
| 10 || +48% || +48% || +48% | |||
|- | |||
| 11 || +51% || +51% || +51% | |||
|- | |||
| 12 || +54% || +54% || +54% | |||
|- | |||
| 13 || +57% || +57% || +57% | |||
|- | |||
| 14 || +60% || +60% || +60% | |||
|- | |||
| 15 || +63% || +63% || +63% | |||
|- | |||
| 16 || +66% || +66% || +66% | |||
|- | |||
| 17 || +69% || +69% || +69% | |||
|- | |||
| 18 || +72% || +72% || +72% | |||
|- | |||
| 19 || +75% || +75% || +75% | |||
|- | |||
| 20 || +78% || +78% || +78% | |||
|- | |||
| 21 || +81% || +81% || +81% | |||
|- | |||
| 22 || +84% || +84% || +84% | |||
|- | |||
| 23 || +87% || +87% || +87% | |||
|- | |||
| 24 || +90% || +90% || +90% | |||
|- | |||
| 25 || +100% || +100% || +100% | |||
|- | |||
| 26 || +110% || +110% || +110% | |||
|- | |||
| 27 || +113% || +113% || +113% | |||
|- | |||
| 28 || +116% || +116% || +116% | |||
|- | |||
| 29 || +119% || +119% || +119% | |||
|- | |||
| 30 || +122% || +122% || +122% | |||
|- | |||
| 31 || +125% || +125% || +125% | |||
|- | |||
| 32 || +128% || +128% || +128% | |||
|- | |||
| 33 || +131% || +131% || +131% | |||
|- | |||
| 34 || +134% || +134% || +134% | |||
|- | |||
| 35 || +137% || +137% || +137% | |||
|- | |||
| 36 || +140% || +140% || +140% | |||
|- | |||
| 37 || +143% || +143% || +143% | |||
|- | |||
| 38 || +146% || +146% || +146% | |||
|- | |||
| 39 || +149% || +149% || +149% | |||
|- | |||
| 40 || +159% || +159% || +159% | |||
|- | |||
| 41 || +163% || +163% || +163% | |||
|- | |||
| 42 || +170% || +170% || +170% | |||
|- | |||
| 43 || +173% || +173% || +173% | |||
|- | |||
| 44 || +180% || +180% || +180% | |||
|- | |||
| 45 || +183% || +183% || +183% | |||
|- | |||
| 46 || +190% || +190% || +190% | |||
|- | |||
| 47 || +193% || +193% || +193% | |||
|- | |||
| 48 || +200% || +200% || +200% | |||
|- | |||
| 49 || +203% || +203% || +203% | |||
|- | |||
| 50 || +219% || +219% || +219% | |||
|} | |||
<br> | |||
==Orbs== | ==Orbs== | ||
Orbs are dropped from mobs in Infinity Field. Can be also obtained from [[Slotmachine|Slotmachines]]. | Orbs are dropped from mobs in Infinity Field. Can be also obtained from [[Slotmachine|Slotmachines]]. Exchange your Orbs for special items in [[Infinity Field Vendor]]. | ||
{{ListItem-PRE}} | {{ListItem-PRE}} | ||
{{ListItem|W= |LINK= [https://chromerivals.net/game/pedia/item/802642766138978304 https://download.chromerivals.net/resources/items_images/big/3737578475.png] | {{ListItem|W= |LINK= [https://chromerivals.net/game/pedia/item/802642766138978304 https://download.chromerivals.net/resources/items_images/big/3737578475.png] | ||
Revision as of 00:28, 28 March 2024
Whilte the ATUM Research Institute was working on the Infinity Project for efficient space travel and exploration, the warp station was hacked by a remnant Shrines' covert unit. Soon after it was hacked, access to unknown areas were discovered. This discovery lead to the deployment of pilots to investigate and secure these areas, unaware of what they will be faced against.
- The Infinity Field have different restrictions such as limited daily access or 60 level requirement.
- When you want to leave Infinity Field area, press
B + Enterto stop your gear and press the Resign button to leave Infinity Field. - When bidding, the keyboard button
Y/Ncan also be used instead of mouse click to decide your bid. - You can exchange your Orbs for special items in Infinity Field Vendor.
Areas
Currently Infinity Field offers thre different areas.
Kreacian Holy Lands
The Hydrogen Driver
Survival Abyss
Difficulty
After creating a waiting room, you can adjust step difficulty level, from minimum 0 (easiest), to maximum of 50 (hardest). Default step difficulty level is 25.
Higher levels include more difficult mobs and bosses, but offer better experience and rewards.
| Level | Experience | Probability | Item Amount |
|---|---|---|---|
| 1 | +21% | +21% | +21% |
| 2 | +24% | +24% | +24% |
| 3 | +27% | +27% | +27% |
| 4 | +30% | +30% | +30% |
| 5 | +33% | +33% | +33% |
| 6 | +36% | +36% | +36% |
| 7 | +39% | +39% | +39% |
| 8 | +42% | +42% | +42% |
| 9 | +45% | +45% | +45% |
| 10 | +48% | +48% | +48% |
| 11 | +51% | +51% | +51% |
| 12 | +54% | +54% | +54% |
| 13 | +57% | +57% | +57% |
| 14 | +60% | +60% | +60% |
| 15 | +63% | +63% | +63% |
| 16 | +66% | +66% | +66% |
| 17 | +69% | +69% | +69% |
| 18 | +72% | +72% | +72% |
| 19 | +75% | +75% | +75% |
| 20 | +78% | +78% | +78% |
| 21 | +81% | +81% | +81% |
| 22 | +84% | +84% | +84% |
| 23 | +87% | +87% | +87% |
| 24 | +90% | +90% | +90% |
| 25 | +100% | +100% | +100% |
| 26 | +110% | +110% | +110% |
| 27 | +113% | +113% | +113% |
| 28 | +116% | +116% | +116% |
| 29 | +119% | +119% | +119% |
| 30 | +122% | +122% | +122% |
| 31 | +125% | +125% | +125% |
| 32 | +128% | +128% | +128% |
| 33 | +131% | +131% | +131% |
| 34 | +134% | +134% | +134% |
| 35 | +137% | +137% | +137% |
| 36 | +140% | +140% | +140% |
| 37 | +143% | +143% | +143% |
| 38 | +146% | +146% | +146% |
| 39 | +149% | +149% | +149% |
| 40 | +159% | +159% | +159% |
| 41 | +163% | +163% | +163% |
| 42 | +170% | +170% | +170% |
| 43 | +173% | +173% | +173% |
| 44 | +180% | +180% | +180% |
| 45 | +183% | +183% | +183% |
| 46 | +190% | +190% | +190% |
| 47 | +193% | +193% | +193% |
| 48 | +200% | +200% | +200% |
| 49 | +203% | +203% | +203% |
| 50 | +219% | +219% | +219% |
Orbs
Orbs are dropped from mobs in Infinity Field. Can be also obtained from Slotmachines. Exchange your Orbs for special items in Infinity Field Vendor.

|
Solar Orb |

|
Quasar Orb |

|
Galaxy Orb |

|
Supercluster Orb |
Modules
IF Modules can be bought From Infinity Field Vendor or obtained from Green Slotmachine.

|
Siphon Module |
Heals you, prioritizing energy, for 30% of the damage with 5% chance for every damage you deal.
Drain Probability and Absorbing Amount can be increased via upgrades.
There is no cool down for it and it becomes active the moment you equip it.

|
Reflection Module |
Reflects enemy attacks with 60% of the damage you were dealt with 20% chance. The damage reflected doesn't get reduced with defense and can't be evaded.
Reflection Chance and Reflected Attack Damage can be increased via upgrades.
To use the module you need to equip it and also drag it into your skill bar and activate it from there. The active duration of the effect is 30 seconds, doesn't get reset when you die. The cooldown time is 15 minutes and it needs to be equipped to cool down.

|
Anti-Siphon Module |
If the gear shooting you is using Siphon Module and the effect of it was to be triggered, there's a 30% chance it won't be triggered if you're using Anti-Siphon Module.
Drain Resist Probability can be increased via upgrades.
There is no cooldown for it and it becomes active the moment you equip it.

|
Anti-Reflect Module |
If the gear you're shooting has Reflection Module active and the effect of it was to be triggered, there's a 30% chance it won't be triggered if you're using Anti-Reflect Module.
Reflect Resist Probability can be increased via upgrades.
There is no cooldown for it and it becomes active the moment you equip it.

|
Emergency Repair Module |
Heals the gear for 3000 energy and 3000 shield points. Energy and Shield heal amount can be increased via upgrades. To use the module you need to equip it and also drag it into your skill bar and activate it from there. The active duration of the effect is 30 seconds, doesn't get reset when you die. The cooldown time is 15 minutes and it needs to be equipped to cool down.
Cards
Cards that are specially designed for Infinity Field Accessorises shown above. They drop from mobs in Infinity Field.
Weapons
To be updated
Armors
To be updated


