
|
Chill of Skadi |

|
Heart of Rock Emperor |

|
Egma Schill Control Unit |

|
Soul of Skadi |

|
Gigantic Central Nerve Piece |

|
Ordin Control Unit |

|
Core of Bishop |

|
Bishop Corona |

|
J Type Super Nanocapsule |

|
C Type Super Nanocapsule |

|
V Type Super Nanocapsule |

|
S Type Super Nanocapsule |

|
Plumage of Rock Emperor |

|
Pheromone of Hornian Queen |

|
Psychic Crystal |

|
Phillon Energy |
Bosses: Difference between revisions
Jump to navigation
Jump to search


No edit summary |
No edit summary |
||
| Line 1: | Line 1: | ||
==Boss Minerals== | ==Boss Minerals== | ||
There are 3 types of boss minerals in the game. Basic boss mineral, refined boss mineral and a boss Strength. They're showed below. | There are 3 types of boss minerals in the game. Basic boss mineral, refined boss mineral and a boss Strength. They're showed below. | ||
| Line 160: | Line 154: | ||
</div> | </div> | ||
{{/Toggle}} | {{/Toggle}} | ||
<!--===Archaic Boss Minerals=== | |||
Can be acquired from seasonal event. | |||
{{Toggle|Title=}} | |||
<div class="TabberBefore"> | |||
<tabber> | |||
|-| = | |||
{| class="TableShops" | |||
|- | |||
| [LINK_PEDIA PICTURE] | |||
| Archaic Chill of Skadi | |||
|- | |||
| [LINK_PEDIA PICTURE] | |||
| Archaic Heart of Rock Emperor | |||
|- | |||
| [LINK_PEDIA PICTURE] | |||
| Archaic Egma Schill Control Unit | |||
|- | |||
| [LINK_PEDIA PICTURE] | |||
| Archaic Soul of Skadi | |||
|- | |||
| [LINK_PEDIA PICTURE] | |||
| Archaic Gigantic Central Nerve Piece | |||
|- | |||
| [LINK_PEDIA PICTURE] | |||
| Archaic Ordin Control Unit | |||
|- | |||
| [LINK_PEDIA PICTURE] | |||
| Archaic Core of Bishop | |||
|- | |||
| [LINK_PEDIA PICTURE] | |||
| Archaic Bishop Corona | |||
|- | |||
| [LINK_PEDIA PICTURE] | |||
| Archaic J Type Super Nanocapsule | |||
|- | |||
| [LINK_PEDIA PICTURE] | |||
| Archaic C Type Super Nanocapsule | |||
|- | |||
| [LINK_PEDIA PICTURE] | |||
| Archaic V Type Super Nanocapsule | |||
|- | |||
| [LINK_PEDIA PICTURE] | |||
| Archaic S Type Super Nanocapsule | |||
|- | |||
| [LINK_PEDIA PICTURE] | |||
| Archaic Plumage of Rock Emperor | |||
|- | |||
| [LINK_PEDIA PICTURE] | |||
| Archaic Pheromone of Hornian Queen | |||
|- | |||
| [LINK_PEDIA PICTURE] | |||
| Archaic Psychic Crystal | |||
|- | |||
| [LINK_PEDIA PICTURE] | |||
| Archaic Phillon Energy | |||
|- | |||
| [LINK_PEDIA PICTURE] | |||
| Archaic NGC Weapon Upgrade Card | |||
|} | |||
</tabber> | |||
</div> | |||
{{/Toggle}}--> | |||
===Boss Strength=== | ===Boss Strength=== | ||
Can be dropped from Bosses. | Can be dropped from Bosses. | ||
| Line 206: | Line 263: | ||
==Bosses== | ==Bosses== | ||
<div class="BossTableBefore"> | |||
<div | {{BossTable | ||
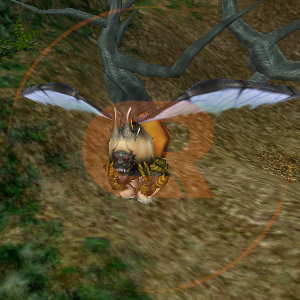
|NAME= Hornian Queen | |||
|IMAGE= W New Hornian Queen.jpg | |||
|LINK= https://chromerivals.net/game/pedia/monster/764182069344489500 | |||
|MAP_ANI= | |||
|MAP_BCU= | |||
|MAP_NEUTRAL= Hornian King's Habitat | |||
|RESPAWN_TIME= 2h | |||
|PHILLON_TOKEN= yes | |||
|PANDEA_TOKEN= | |||
|REVOLT_IGN_TOKEN= | |||
}} | |||
{{BossTable | |||
|NAME= Mountain Sage | |||
|IMAGE= W New Mountain Sage.jpg | |||
|LINK= https://chromerivals.net/game/pedia/monster/761944773358538800 | |||
|MAP_ANI= | |||
|MAP_BCU= Bach Mountain Chain | |||
|MAP_NEUTRAL= | |||
= | |RESPAWN_TIME= 6h | ||
|PHILLON_TOKEN= yes | |||
|PANDEA_TOKEN= | |||
|REVOLT_IGN_TOKEN= | |||
}} | |||
{{BossTable | |||
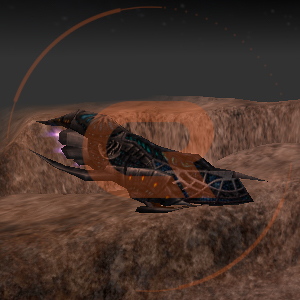
|NAME= Messenger | |||
|IMAGE= W New Messenger.jpg | |||
|LINK= https://chromerivals.net/game/pedia/monster/763119997668053000 | |||
|MAP_ANI= Desert of Ardor | |||
|MAP_BCU= | |||
|MAP_NEUTRAL= | |||
|RESPAWN_TIME= 6h | |||
|PHILLON_TOKEN= yes | |||
|PANDEA_TOKEN= | |||
|REVOLT_IGN_TOKEN= | |||
}} | |||
{{BossTable | |||
= | |NAME= Pathos | ||
|IMAGE= W New Pathos.jpg | |||
|LINK= https://chromerivals.net/game/pedia/monster/764588735659528200 | |||
|MAP_ANI= | |||
|MAP_BCU= Zaylope Beach | |||
|MAP_NEUTRAL= | |||
|RESPAWN_TIME= 2h | |||
|PHILLON_TOKEN= yes | |||
|PANDEA_TOKEN= | |||
|REVOLT_IGN_TOKEN= | |||
}} | |||
{{BossTable | |||
|NAME= Prog. Military Base | |||
|IMAGE= W New Prog. Millitary Base.jpg | |||
|LINK= https://chromerivals.net/game/pedia/monster/761944773417259000 | |||
|MAP_ANI= | |||
|MAP_BCU= Starlite Valley | |||
|MAP_NEUTRAL= | |||
= | |RESPAWN_TIME= 2h | ||
|PHILLON_TOKEN= yes | |||
|PANDEA_TOKEN= | |||
|REVOLT_IGN_TOKEN= | |||
}} | |||
{{BossTable | |||
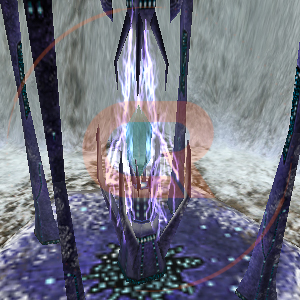
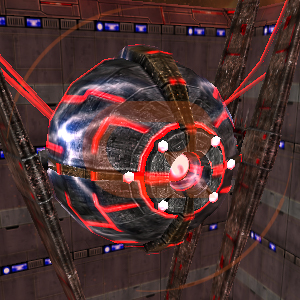
|NAME= Energy Core | |||
|IMAGE= W New Energy Core.jpg | |||
|LINK= https://chromerivals.net/game/pedia/monster/764588486207492100 | |||
|MAP_ANI= The Violence Blizzard | |||
|MAP_BCU= | |||
|MAP_NEUTRAL= | |||
2h | |RESPAWN_TIME= 2h | ||
|PHILLON_TOKEN= yes | |||
|PANDEA_TOKEN= | |||
|REVOLT_IGN_TOKEN= | |||
}} | |||
{{BossTable | |||
= | |NAME= Shirne | ||
|IMAGE= W New Shirne.jpg | |||
|LINK= https://chromerivals.net/game/pedia/monster/763156516252438500 | |||
|MAP_ANI= Herremeze Relic Site | |||
|MAP_BCU= | |||
|MAP_NEUTRAL= | |||
|RESPAWN_TIME= 2h | |||
|PHILLON_TOKEN= yes | |||
|PANDEA_TOKEN= | |||
|REVOLT_IGN_TOKEN= | |||
}} | |||
{{BossTable | |||
|NAME= Nipar Bridge | |||
|IMAGE= W New Nipar Bridge.jpg | |||
|LINK= https://chromerivals.net/game/pedia/monster/764588735747608600 | |||
|MAP_ANI= | |||
|MAP_BCU= Sunken City | |||
|MAP_NEUTRAL= | |||
=' | |RESPAWN_TIME= 2h | ||
|PHILLON_TOKEN= yes | |||
|PANDEA_TOKEN= | |||
|REVOLT_IGN_TOKEN= | |||
}} | |||
{{BossTable | |||
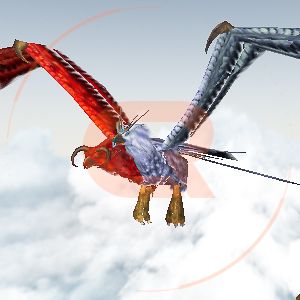
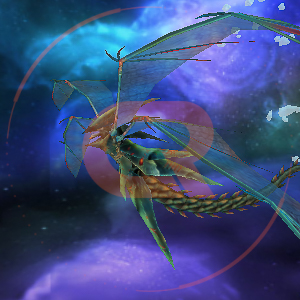
|NAME= Quetzalcoatl | |||
|IMAGE= W New Quetzalcoatl.jpg | |||
|LINK= https://chromerivals.net/game/pedia/monster/764182069545816000 | |||
|MAP_ANI= Rock's Nest Bottom | |||
|MAP_BCU= Rock's Nest Bottom | |||
|MAP_NEUTRAL= | |||
|RESPAWN_TIME= 2h | |||
|PHILLON_TOKEN= yes | |||
|PANDEA_TOKEN= | |||
|REVOLT_IGN_TOKEN= | |||
}} | |||
{{BossTable | |||
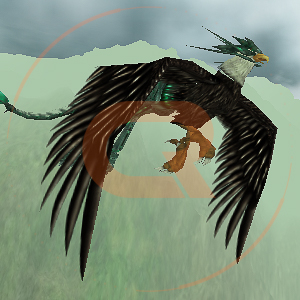
= | |NAME= Gryphon | ||
|IMAGE= W New Gryphon.jpg | |||
|LINK= https://chromerivals.net/game/pedia/monster/764588735781163000 | |||
|MAP_ANI= Rock's Nest Middle | |||
|MAP_BCU= Rock's Nest Middle | |||
|MAP_NEUTRAL= | |||
|RESPAWN_TIME= 2h | |||
|PHILLON_TOKEN= yes | |||
|PANDEA_TOKEN= | |||
|REVOLT_IGN_TOKEN= | |||
}} | |||
{{BossTable | |||
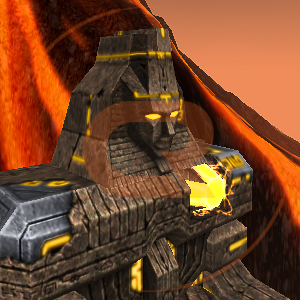
|NAME= Rock Emperor | |||
|IMAGE= W New Rock Emperor.jpg | |||
|LINK= https://chromerivals.net/game/pedia/monster/764199142942593000 | |||
|MAP_ANI= | |||
|MAP_BCU= | |||
|MAP_NEUTRAL= Rock's Nest Top | |||
= | |RESPAWN_TIME= 2h | ||
|PHILLON_TOKEN= yes | |||
|PANDEA_TOKEN= | |||
|REVOLT_IGN_TOKEN= | |||
}} | |||
{{BossTable | |||
|NAME= Ordin | |||
|IMAGE= W New Ordin.jpg | |||
|LINK= https://chromerivals.net/game/pedia/monster/764111152580939800 | |||
|MAP_ANI= | |||
|MAP_BCU= | |||
|MAP_NEUTRAL= Eopi | |||
|RESPAWN_TIME= 2h | |||
|PHILLON_TOKEN= yes | |||
|PANDEA_TOKEN= | |||
|REVOLT_IGN_TOKEN= | |||
}} | |||
{{BossTable | |||
= | |NAME= Azimuth | ||
|IMAGE= W New Azimuth.jpg | |||
|LINK= https://chromerivals.net/game/pedia/monster/764273742804176900 | |||
|MAP_ANI= | |||
|MAP_BCU= | |||
|MAP_NEUTRAL= Sector 71 Operation | |||
|RESPAWN_TIME= 6h | |||
|PHILLON_TOKEN= yes | |||
|PANDEA_TOKEN= | |||
|REVOLT_IGN_TOKEN= | |||
}} | |||
{{BossTable | |||
|NAME= Egma Schill | |||
|IMAGE= W New Egma Schill.jpg | |||
|LINK= https://chromerivals.net/game/pedia/monster/763156515245805600 | |||
|MAP_ANI= Chaos | |||
|MAP_BCU= Chaos | |||
|MAP_NEUTRAL= Chaos | |||
= | |RESPAWN_TIME= 6h | ||
|PHILLON_TOKEN= yes | |||
|PANDEA_TOKEN= | |||
|REVOLT_IGN_TOKEN= | |||
}} | |||
{{BossTable | |||
|NAME= Skadi | |||
|IMAGE= W New Skadi.jpg | |||
|LINK= https://chromerivals.net/game/pedia/monster/764182736305934300 | |||
|MAP_ANI= | |||
|MAP_BCU= | |||
|MAP_NEUTRAL= Fantasy Flow | |||
|RESPAWN_TIME= 2h | |||
|PHILLON_TOKEN= yes | |||
|PANDEA_TOKEN= | |||
|REVOLT_IGN_TOKEN= | |||
}} | |||
{{BossTable | |||
= | |NAME= Gigantic God | ||
|IMAGE= W New Gigantic God.jpg | |||
|LINK= https://chromerivals.net/game/pedia/monster/762916803910324200 | |||
|MAP_ANI= | |||
|MAP_BCU= | |||
|MAP_NEUTRAL= Lumein Volcano | |||
|RESPAWN_TIME= 8h | |||
|PHILLON_TOKEN= yes | |||
|PANDEA_TOKEN= | |||
|REVOLT_IGN_TOKEN= | |||
}} | |||
{{BossTable | |||
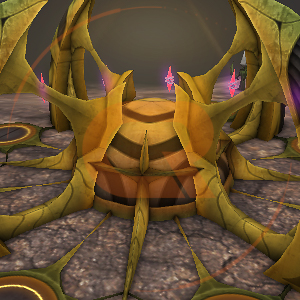
|NAME= Bishops | |||
|IMAGE= W New Bishops.jpg | |||
|LINK= https://chromerivals.net/game/pedia/monster/761950599590727700 | |||
|MAP_ANI= | |||
|MAP_BCU= | |||
|MAP_NEUTRAL= G-ARK | |||
= | |RESPAWN_TIME= 6h | ||
|PHILLON_TOKEN= yes | |||
|PANDEA_TOKEN= | |||
|REVOLT_IGN_TOKEN= | |||
}} | |||
{{BossTable | |||
|NAME= Sekhmete | |||
|IMAGE= W New Sekhmente.jpg | |||
|LINK= https://chromerivals.net/game/pedia/monster/764182736435957800 | |||
|MAP_ANI= | |||
|MAP_BCU= | |||
|MAP_NEUTRAL= ATUM-2 | |||
|RESPAWN_TIME= 7h | |||
|PHILLON_TOKEN= yes | |||
|PANDEA_TOKEN= | |||
|REVOLT_IGN_TOKEN= | |||
}} | |||
{{BossTable | |||
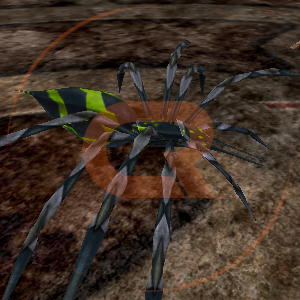
= | |NAME= Black Widow | ||
|IMAGE= W New Black Widow.jpg | |||
|LINK= https://chromerivals.net/game/pedia/monster/764280926703210500 | |||
|MAP_ANI= Slope Port | |||
|MAP_BCU= Orina Peninsula | |||
|MAP_NEUTRAL= Vatallus Laboratory | |||
|RESPAWN_TIME= 6h | |||
|PHILLON_TOKEN= | |||
|PANDEA_TOKEN= yes | |||
|REVOLT_IGN_TOKEN= | |||
}} | |||
{{BossTable | |||
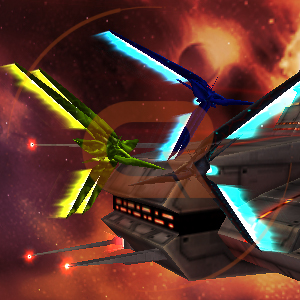
|NAME= Echelon | |||
|IMAGE= W New Echelon.jpg | |||
|LINK= https://chromerivals.net/game/pedia/monster/764182736767307800 | |||
|MAP_ANI= Portsmouth Canyon | |||
|MAP_BCU= Daisy Riverhead | |||
|MAP_NEUTRAL= Vatallus Laboratory | |||
= | |RESPAWN_TIME= 7h | ||
|PHILLON_TOKEN= | |||
|PANDEA_TOKEN= yes | |||
|REVOLT_IGN_TOKEN= | |||
< | }} | ||
{{BossTable | |||
|NAME= Guardian of Vatallus | |||
|IMAGE= W New Guardian of Vatallus.jpg | |||
|LINK= https://chromerivals.net/game/pedia/monster/764182736704393200 | |||
|MAP_ANI= | |||
|MAP_BCU= | |||
|MAP_NEUTRAL= Sunshine Born<br>Vatallus Laboratory | |||
|RESPAWN_TIME= 8h | |||
|PHILLON_TOKEN= | |||
|PANDEA_TOKEN= yes | |||
|REVOLT_IGN_TOKEN= | |||
}} | |||
{{BossTable | |||
= | |NAME= RM-230 | ||
|IMAGE= W New RM-230.jpg | |||
|LINK= https://chromerivals.net/game/pedia/monster/762172289146966000 | |||
|MAP_ANI= | |||
|MAP_BCU= | |||
|MAP_NEUTRAL= J-ARK Engine Room | |||
|RESPAWN_TIME= 5h | |||
|PHILLON_TOKEN= | |||
|PANDEA_TOKEN= yes | |||
|REVOLT_IGN_TOKEN= | |||
}} | |||
{{BossTable | |||
|NAME= Eater | |||
|IMAGE= W New Eater.jpg | |||
|LINK= https://chromerivals.net/game/pedia/monster/762284072566280200 | |||
|MAP_ANI= | |||
|MAP_BCU= | |||
|MAP_NEUTRAL= Floating Lake | |||
= | |RESPAWN_TIME= 8h | ||
|PHILLON_TOKEN= | |||
|PANDEA_TOKEN= | |||
|REVOLT_IGN_TOKEN= yes | |||
}} | |||
{{BossTable | |||
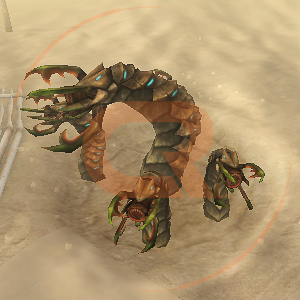
|NAME= Death Worm | |||
|IMAGE= W New Death Worm.jpg | |||
|LINK= https://chromerivals.net/game/pedia/monster/762284072604028900 | |||
|MAP_ANI= | |||
|MAP_BCU= | |||
|MAP_NEUTRAL= Lost Oasis | |||
|RESPAWN_TIME= 8h | |||
|PHILLON_TOKEN= | |||
|PANDEA_TOKEN= | |||
|REVOLT_IGN_TOKEN= yes | |||
}} | |||
{{BossTable | |||
|NAME= NGC Calcani | |||
|IMAGE= W New NGC Calcani.jpg | |||
|LINK= https://chromerivals.net/game/pedia/monster/762284072750829600 | |||
|MAP_ANI= | |||
|MAP_BCU= | |||
|MAP_NEUTRAL= Hazle Research Center | |||
|RESPAWN_TIME= 8h | |||
| | |PHILLON_TOKEN= | ||
| | |PANDEA_TOKEN= | ||
|REVOLT_IGN_TOKEN= yes | |||
}} | |||
{{BossTable | |||
|NAME= Overlord-01 | |||
|IMAGE= W New Overlord-01.jpg | |||
|LINK= https://chromerivals.net/game/pedia/monster/762284072692109300 | |||
|MAP_ANI= | |||
|MAP_BCU= | |||
|MAP_NEUTRAL= Hazle Research Center | |||
|RESPAWN_TIME= 8h | |||
|PHILLON_TOKEN= | |||
|PANDEA_TOKEN= | |||
|REVOLT_IGN_TOKEN= yes | |||
}} | |||
{{BossTable | |||
|NAME= Saleos | |||
|IMAGE= W New Saleos.jpg | |||
|LINK= https://chromerivals.net/game/pedia/monster/762284072889241600 | |||
|MAP_ANI= | |||
|MAP_BCU= | |||
|MAP_NEUTRAL= Violet Cave | |||
|RESPAWN_TIME= 8h | |||
|PHILLON_TOKEN= | |||
|PANDEA_TOKEN= | |||
|REVOLT_IGN_TOKEN= <span title="No one likes this boss am I right? Imo it's easy to kill with needle.";>yes</span> | |||
}} | |||
{{BossTable | |||
|NAME= Tetzlica | |||
|IMAGE= W New Tetzlica.jpg | |||
|LINK= https://chromerivals.net/game/pedia/monster/762284072956350500 | |||
|MAP_ANI= | |||
|MAP_BCU= | |||
|MAP_NEUTRAL= Mirny Stope | |||
|RESPAWN_TIME= 8h | |||
|PHILLON_TOKEN= | |||
|PANDEA_TOKEN= | |||
|REVOLT_IGN_TOKEN= yes | |||
}} | |||
{{BossTable | |||
|NAME= Overhead Completion | |||
|IMAGE= W New Overhead Completion.jpg | |||
|LINK= https://chromerivals.net/game/pedia/monster/762284073019265000 | |||
|MAP_ANI= | |||
|MAP_BCU= | |||
|MAP_NEUTRAL= Eldorado Metropolis | |||
|RESPAWN_TIME= 8h | |||
|PHILLON_TOKEN= | |||
|PANDEA_TOKEN= | |||
|REVOLT_IGN_TOKEN= yes | |||
}} | |||
{{BossTable | |||
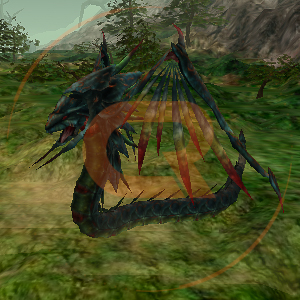
|NAME= Lord Kreacia | |||
|IMAGE= W New Lord Kreacia.jpg | |||
|LINK= https://chromerivals.net/game/pedia/monster/762172820695306200 | |||
|MAP_ANI= Dragon Lair | |||
|MAP_BCU= Dragon Lair | |||
|MAP_NEUTRAL= | |||
|RESPAWN_TIME= 9h | |||
|PHILLON_TOKEN= yes | |||
|PANDEA_TOKEN= yes | |||
|REVOLT_IGN_TOKEN= yes | |||
}} | |||
{{BossTable | |||
|NAME= Calamity | |||
|IMAGE= W New Calamity.jpg | |||
|LINK= https://chromerivals.net/game/pedia/monster/895650918194761728 | |||
|MAP_ANI= | |||
|MAP_BCU= | |||
|MAP_NEUTRAL= Ash Lane | |||
|RESPAWN_TIME= | |||
|RESPAWN_TIME_CRYSTAL= On specific Crystals combination. | |||
|PHILLON_TOKEN= | |||
|PANDEA_TOKEN= | |||
|REVOLT_IGN_TOKEN= Event Items | |||
}} | |||
<!-- INSERT NEW BOSSES ADDED HERE -------------------------------------------------- --> | |||
{{BossTable | |||
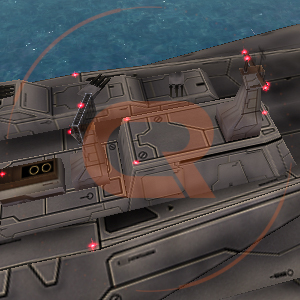
|NAME= NGC Mothership | |||
|IMAGE= W New NGC Mothership.jpg | |||
|LINK= https://chromerivals.net/game/pedia/monster/762284072637583400 | |||
|MAP_ANI= | |||
|MAP_BCU= | |||
|MAP_NEUTRAL= NGC Marine Laboratory | |||
|RESPAWN_TIME= 24h | |||
|PHILLON_TOKEN= | |||
|PANDEA_TOKEN= | |||
|REVOLT_IGN_TOKEN= yes | |||
}} | |||
{{BossTable | |||
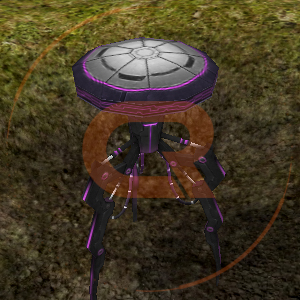
|NAME= NGC Strategic Point | |||
|IMAGE= W New NGC Strategic Point.jpg | |||
|LINK= https://chromerivals.net/game/pedia/monster/767355598571327500 | |||
|MAP_ANI= | |||
|MAP_BCU= | |||
|MAP_NEUTRAL= Floating Lake<br>Hazle Research Center<br>Violet Cave | |||
|RESPAWN_TIME= 35h | |||
|PHILLON_TOKEN= | |||
|PANDEA_TOKEN= | |||
|REVOLT_IGN_TOKEN= 20k War Points | |||
}} | |||
</div> | |||
<br> | |||
<br> | |||
See also: [[Crystals]]. | |||
Revision as of 23:14, 3 March 2024
Boss Minerals
There are 3 types of boss minerals in the game. Basic boss mineral, refined boss mineral and a boss Strength. They're showed below.
Combining Boss Strength together with 10x of Basic corresponding Boss Mineral will result in crafting its Refined mineral form, which is used to craft Reinforced Boss Transformation Card.
Basic Boss Minerals
Can be dropped from Bosses or Mobs.
Expand


Refined Boss Minerals
Can be acquired from Bosses or Event Shop.
Expand


Boss Strength
Can be dropped from Bosses.
Expand


Bosses
2h
6h
6h
2h
2h
2h
2h
2h
2h
2h
2h
6h
6h
2h
8h
6h
7h
6h
7h
8h
5h
8h
8h
8h
8h
8h
8h
8h
9h
24h
35h
See also: Crystals.