|
|
| Line 1: |
Line 1: |
| {| class="mw-collapsible mw-collapsed"
| |
| ! style="color: white; background: #2B2B2B;" | '''Table of Contents'''
| |
| |-
| |
| | style="background: #2B2B2B;" | __TOC__
| |
| |}
| |
|
| |
| ==Boss Minerals== | | ==Boss Minerals== |
| There are 3 types of boss minerals in the game. Basic boss mineral, refined boss mineral and a boss Strength. They're showed below. | | There are 3 types of boss minerals in the game. Basic boss mineral, refined boss mineral and a boss Strength. They're showed below. |
| Line 160: |
Line 154: |
| </div> | | </div> |
| {{/Toggle}} | | {{/Toggle}} |
| | <!--===Archaic Boss Minerals=== |
| | Can be acquired from seasonal event. |
| | |
| | {{Toggle|Title=}} |
| | <div class="TabberBefore"> |
| | <tabber> |
| | |-| = |
|
| |
|
| | {| class="TableShops" |
| | |- |
| | | [LINK_PEDIA PICTURE] |
| | | Archaic Chill of Skadi |
| | |- |
| | | [LINK_PEDIA PICTURE] |
| | | Archaic Heart of Rock Emperor |
| | |- |
| | | [LINK_PEDIA PICTURE] |
| | | Archaic Egma Schill Control Unit |
| | |- |
| | | [LINK_PEDIA PICTURE] |
| | | Archaic Soul of Skadi |
| | |- |
| | | [LINK_PEDIA PICTURE] |
| | | Archaic Gigantic Central Nerve Piece |
| | |- |
| | | [LINK_PEDIA PICTURE] |
| | | Archaic Ordin Control Unit |
| | |- |
| | | [LINK_PEDIA PICTURE] |
| | | Archaic Core of Bishop |
| | |- |
| | | [LINK_PEDIA PICTURE] |
| | | Archaic Bishop Corona |
| | |- |
| | | [LINK_PEDIA PICTURE] |
| | | Archaic J Type Super Nanocapsule |
| | |- |
| | | [LINK_PEDIA PICTURE] |
| | | Archaic C Type Super Nanocapsule |
| | |- |
| | | [LINK_PEDIA PICTURE] |
| | | Archaic V Type Super Nanocapsule |
| | |- |
| | | [LINK_PEDIA PICTURE] |
| | | Archaic S Type Super Nanocapsule |
| | |- |
| | | [LINK_PEDIA PICTURE] |
| | | Archaic Plumage of Rock Emperor |
| | |- |
| | | [LINK_PEDIA PICTURE] |
| | | Archaic Pheromone of Hornian Queen |
| | |- |
| | | [LINK_PEDIA PICTURE] |
| | | Archaic Psychic Crystal |
| | |- |
| | | [LINK_PEDIA PICTURE] |
| | | Archaic Phillon Energy |
| | |- |
| | | [LINK_PEDIA PICTURE] |
| | | Archaic NGC Weapon Upgrade Card |
| | |} |
| | </tabber> |
| | </div> |
| | {{/Toggle}}--> |
| ===Boss Strength=== | | ===Boss Strength=== |
| Can be dropped from Bosses. | | Can be dropped from Bosses. |
| Line 206: |
Line 263: |
|
| |
|
| ==Bosses== | | ==Bosses== |
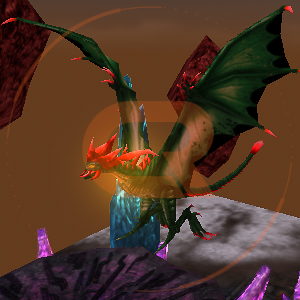
| ='''Hornian Queen'''=
| | <div class="BossTableBefore"> |
| <div style="text-align: left;"> | | {{BossTable |
| [[File:Hornian Queen.png|400px]]
| | |NAME= Hornian Queen |
| | | |IMAGE= W New Hornian Queen.jpg |
| <iframe key="chromerivals" path="game/pedia/monster/764182069344489500?headless=1" width="350" height="405" frameborder="0"></iframe>
| | |LINK= https://chromerivals.net/game/pedia/monster/764182069344489500 |
| | | |MAP_ANI= |
| '''Map/Location:'''
| | |MAP_BCU= |
| | | |MAP_NEUTRAL= Hornian King's Habitat |
| <span style="color:yellow;>Hornian King's Habitat</span>
| | |RESPAWN_TIME= 2h |
| | | |PHILLON_TOKEN= yes |
| '''Respawn Time:'''
| | |PANDEA_TOKEN= |
| | | |REVOLT_IGN_TOKEN= |
| 2h
| | }} |
| | | {{BossTable |
| '''Drops:'''
| | |NAME= Mountain Sage |
| | | |IMAGE= W New Mountain Sage.jpg |
| <span style="color:#b858cc;>Phillon Token</span>
| | |LINK= https://chromerivals.net/game/pedia/monster/761944773358538800 |
| | | |MAP_ANI= |
| | | |MAP_BCU= Bach Mountain Chain |
| | | |MAP_NEUTRAL= |
| ='''Mountain Sage'''= | | |RESPAWN_TIME= 6h |
| <div style="text-align: left;">
| | |PHILLON_TOKEN= yes |
| [[File:Mountain Sage.png|400px]]
| | |PANDEA_TOKEN= |
| | | |REVOLT_IGN_TOKEN= |
| <iframe key="chromerivals" path="game/pedia/monster/761944773358538800?headless=1" width="350" height="405" frameborder="0"></iframe>
| | }} |
| | | {{BossTable |
| '''Map/Location:'''
| | |NAME= Messenger |
| | | |IMAGE= W New Messenger.jpg |
| <span style="color:orange;>Bach Mountain Chain</span>
| | |LINK= https://chromerivals.net/game/pedia/monster/763119997668053000 |
| | | |MAP_ANI= Desert of Ardor |
| '''Respawn Time:'''
| | |MAP_BCU= |
| | | |MAP_NEUTRAL= |
| 6h
| | |RESPAWN_TIME= 6h |
| | | |PHILLON_TOKEN= yes |
| '''Drops:'''
| | |PANDEA_TOKEN= |
| | | |REVOLT_IGN_TOKEN= |
| <span style="color:#b858cc;>Phillon Token</span>
| | }} |
| | | {{BossTable |
| ='''Messenger'''= | | |NAME= Pathos |
| <div style="text-align: left;">
| | |IMAGE= W New Pathos.jpg |
| [[File:Messanger.png|400px]]
| | |LINK= https://chromerivals.net/game/pedia/monster/764588735659528200 |
| | | |MAP_ANI= |
| <iframe key="chromerivals" path="game/pedia/monster/763119997668053000?headless=1" width="350" height="405" frameborder="0"></iframe>
| | |MAP_BCU= Zaylope Beach |
| | | |MAP_NEUTRAL= |
| '''Map/Location:'''
| | |RESPAWN_TIME= 2h |
| | | |PHILLON_TOKEN= yes |
| <span style="color:cyan;>Desert of Ardor</span>
| | |PANDEA_TOKEN= |
| | | |REVOLT_IGN_TOKEN= |
| '''Respawn Time:'''
| | }} |
| | | {{BossTable |
| 6h
| | |NAME= Prog. Military Base |
| | | |IMAGE= W New Prog. Millitary Base.jpg |
| '''Drops:'''
| | |LINK= https://chromerivals.net/game/pedia/monster/761944773417259000 |
| | | |MAP_ANI= |
| <span style="color:#b858cc;>Phillon Token</span>
| | |MAP_BCU= Starlite Valley |
| | | |MAP_NEUTRAL= |
| ='''Pathos'''= | | |RESPAWN_TIME= 2h |
| <div style="text-align: left;">
| | |PHILLON_TOKEN= yes |
| [[File:Pathos.png|400px]]
| | |PANDEA_TOKEN= |
| | | |REVOLT_IGN_TOKEN= |
| <iframe key="chromerivals" path="game/pedia/monster/764588735659528200?headless=1" width="350" height="405" frameborder="0"></iframe>
| | }} |
| | | {{BossTable |
| '''Map/Location:'''
| | |NAME= Energy Core |
| | | |IMAGE= W New Energy Core.jpg |
| <span style="color:orange;>Zaylope Beach</span>
| | |LINK= https://chromerivals.net/game/pedia/monster/764588486207492100 |
| | | |MAP_ANI= The Violence Blizzard |
| '''Respawn Time:'''
| | |MAP_BCU= |
| | | |MAP_NEUTRAL= |
| 2h | | |RESPAWN_TIME= 2h |
| | | |PHILLON_TOKEN= yes |
| '''Drops:'''
| | |PANDEA_TOKEN= |
| | | |REVOLT_IGN_TOKEN= |
| <span style="color:#b858cc;>Phillon Token</span>
| | }} |
| | | {{BossTable |
| ='''Prog. Military Base'''= | | |NAME= Shirne |
| <div style="text-align: left;">
| | |IMAGE= W New Shirne.jpg |
| [[File:Prog. Base.png|400px]]
| | |LINK= https://chromerivals.net/game/pedia/monster/763156516252438500 |
| | | |MAP_ANI= Herremeze Relic Site |
| <iframe key="chromerivals" path="game/pedia/monster/761944773417259000?headless=1" width="350" height="405" frameborder="0"></iframe>
| | |MAP_BCU= |
| | | |MAP_NEUTRAL= |
| '''Map/Location:'''
| | |RESPAWN_TIME= 2h |
| | | |PHILLON_TOKEN= yes |
| <span style="color:orange;>Starlite Valley</span>
| | |PANDEA_TOKEN= |
| | | |REVOLT_IGN_TOKEN= |
| '''Respawn Time:'''
| | }} |
| | | {{BossTable |
| 2h
| | |NAME= Nipar Bridge |
| | | |IMAGE= W New Nipar Bridge.jpg |
| '''Drops:'''
| | |LINK= https://chromerivals.net/game/pedia/monster/764588735747608600 |
| | | |MAP_ANI= |
| <span style="color:#b858cc;>Phillon Token</span>
| | |MAP_BCU= Sunken City |
| | | |MAP_NEUTRAL= |
| ='''Energy Core'''= | | |RESPAWN_TIME= 2h |
| <div style="text-align: left;">
| | |PHILLON_TOKEN= yes |
| [[File:Energy Core.png|400px]]
| | |PANDEA_TOKEN= |
| | | |REVOLT_IGN_TOKEN= |
| <iframe key="chromerivals" path="game/pedia/monster/764588486207492100?headless=1" width="350" height="405" frameborder="0"></iframe>
| | }} |
| | | {{BossTable |
| '''Map/Location:'''
| | |NAME= Quetzalcoatl |
| | | |IMAGE= W New Quetzalcoatl.jpg |
| <span style="color:cyan;>The Violence Blizzard</span>
| | |LINK= https://chromerivals.net/game/pedia/monster/764182069545816000 |
| | | |MAP_ANI= Rock's Nest Bottom |
| '''Respawn Time:'''
| | |MAP_BCU= Rock's Nest Bottom |
| | | |MAP_NEUTRAL= |
| 2h
| | |RESPAWN_TIME= 2h |
| | | |PHILLON_TOKEN= yes |
| '''Drops:'''
| | |PANDEA_TOKEN= |
| | | |REVOLT_IGN_TOKEN= |
| <span style="color:#b858cc;>Phillon Token</span>
| | }} |
| | | {{BossTable |
| ='''Shirne'''= | | |NAME= Gryphon |
| <div style="text-align: left;">
| | |IMAGE= W New Gryphon.jpg |
| [[File:Shrine.png|400px]]
| | |LINK= https://chromerivals.net/game/pedia/monster/764588735781163000 |
| | | |MAP_ANI= Rock's Nest Middle |
| <iframe key="chromerivals" path="game/pedia/monster/763156516252438500?headless=1" width="350" height="405" frameborder="0"></iframe>
| | |MAP_BCU= Rock's Nest Middle |
| | | |MAP_NEUTRAL= |
| '''Map/Location:'''
| | |RESPAWN_TIME= 2h |
| | | |PHILLON_TOKEN= yes |
| <span style="color:cyan;>Herremeze Relic Site</span>
| | |PANDEA_TOKEN= |
| | | |REVOLT_IGN_TOKEN= |
| '''Respawn Time:'''
| | }} |
| | | {{BossTable |
| 2h
| | |NAME= Rock Emperor |
| | | |IMAGE= W New Rock Emperor.jpg |
| '''Drops:'''
| | |LINK= https://chromerivals.net/game/pedia/monster/764199142942593000 |
| | | |MAP_ANI= |
| <span style="color:#b858cc;>Phillon Token</span>
| | |MAP_BCU= |
| | | |MAP_NEUTRAL= Rock's Nest Top |
| ='''Nipar Bridge'''= | | |RESPAWN_TIME= 2h |
| <div style="text-align: left;">
| | |PHILLON_TOKEN= yes |
| [[File:Nipar Bridge.png|400px]]
| | |PANDEA_TOKEN= |
| | | |REVOLT_IGN_TOKEN= |
| <iframe key="chromerivals" path="game/pedia/monster/764588735747608600?headless=1" width="350" height="405" frameborder="0"></iframe>
| | }} |
| | | {{BossTable |
| '''Map/Location:'''
| | |NAME= Ordin |
| | | |IMAGE= W New Ordin.jpg |
| <span style="color:orange;>Sunken City</span>
| | |LINK= https://chromerivals.net/game/pedia/monster/764111152580939800 |
| | | |MAP_ANI= |
| '''Respawn Time:'''
| | |MAP_BCU= |
| | | |MAP_NEUTRAL= Eopi |
| 2h
| | |RESPAWN_TIME= 2h |
| | | |PHILLON_TOKEN= yes |
| '''Drops:'''
| | |PANDEA_TOKEN= |
| | | |REVOLT_IGN_TOKEN= |
| <span style="color:#b858cc;>Phillon Token</span>
| | }} |
| | | {{BossTable |
| ='''Quetzalcoatl'''= | | |NAME= Azimuth |
| <div style="text-align: left;">
| | |IMAGE= W New Azimuth.jpg |
| [[File:Quetzalcoatl.png|400px]]
| | |LINK= https://chromerivals.net/game/pedia/monster/764273742804176900 |
| | | |MAP_ANI= |
| <iframe key="chromerivals" path="game/pedia/monster/764182069545816000?headless=1" width="350" height="405" frameborder="0"></iframe>
| | |MAP_BCU= |
| | | |MAP_NEUTRAL= Sector 71 Operation |
| '''Map/Location:'''
| | |RESPAWN_TIME= 6h |
| | | |PHILLON_TOKEN= yes |
| <span style="color:orange;>Rock's Nest Bottom</span>, <span style="color:cyan;>Rock's Nest Bottom</span>
| | |PANDEA_TOKEN= |
| | | |REVOLT_IGN_TOKEN= |
| '''Respawn Time:'''
| | }} |
| | | {{BossTable |
| 2h
| | |NAME= Egma Schill |
| | | |IMAGE= W New Egma Schill.jpg |
| '''Drops:'''
| | |LINK= https://chromerivals.net/game/pedia/monster/763156515245805600 |
| | | |MAP_ANI= Chaos |
| <span style="color:#b858cc;>Phillon Token</span>
| | |MAP_BCU= Chaos |
| | | |MAP_NEUTRAL= Chaos |
| ='''Gryphon'''= | | |RESPAWN_TIME= 6h |
| <div style="text-align: left;">
| | |PHILLON_TOKEN= yes |
| [[File:Gryphon.png|400px]]
| | |PANDEA_TOKEN= |
| | | |REVOLT_IGN_TOKEN= |
| <iframe key="chromerivals" path="game/pedia/monster/764588735781163000?headless=1" width="350" height="405" frameborder="0"></iframe>
| | }} |
| | | {{BossTable |
| '''Map/Location:'''
| | |NAME= Skadi |
| | | |IMAGE= W New Skadi.jpg |
| <span style="color:orange;>Rock's Nest Middle</span>, <span style="color:cyan;>Rock's Nest Middle</span>
| | |LINK= https://chromerivals.net/game/pedia/monster/764182736305934300 |
| | | |MAP_ANI= |
| '''Respawn Time:'''
| | |MAP_BCU= |
| | | |MAP_NEUTRAL= Fantasy Flow |
| 2h
| | |RESPAWN_TIME= 2h |
| | | |PHILLON_TOKEN= yes |
| '''Drops:'''
| | |PANDEA_TOKEN= |
| | | |REVOLT_IGN_TOKEN= |
| <span style="color:#b858cc;>Phillon Token</span>
| | }} |
| | | {{BossTable |
| ='''Rock Emperor'''= | | |NAME= Gigantic God |
| <div style="text-align: left;">
| | |IMAGE= W New Gigantic God.jpg |
| [[File:Rock Emperor.png|400px]]
| | |LINK= https://chromerivals.net/game/pedia/monster/762916803910324200 |
| | | |MAP_ANI= |
| <iframe key="chromerivals" path="game/pedia/monster/764199142942593000?headless=1" width="350" height="405" frameborder="0"></iframe>
| | |MAP_BCU= |
| | | |MAP_NEUTRAL= Lumein Volcano |
| '''Map/Location:'''
| | |RESPAWN_TIME= 8h |
| | | |PHILLON_TOKEN= yes |
| <span style="color:yellow;>Rock's Nest Top</span>
| | |PANDEA_TOKEN= |
| | | |REVOLT_IGN_TOKEN= |
| '''Respawn Time:'''
| | }} |
| | | {{BossTable |
| 2h
| | |NAME= Bishops |
| | | |IMAGE= W New Bishops.jpg |
| '''Drops:'''
| | |LINK= https://chromerivals.net/game/pedia/monster/761950599590727700 |
| | | |MAP_ANI= |
| <span style="color:#b858cc;>Phillon Token</span>
| | |MAP_BCU= |
| | | |MAP_NEUTRAL= G-ARK |
| ='''Ordin'''= | | |RESPAWN_TIME= 6h |
| <div style="text-align: left;">
| | |PHILLON_TOKEN= yes |
| [[File:Ordin.png|400px]]
| | |PANDEA_TOKEN= |
| | | |REVOLT_IGN_TOKEN= |
| <iframe key="chromerivals" path="game/pedia/monster/764111152580939800?headless=1" width="350" height="405" frameborder="0"></iframe>
| | }} |
| | | {{BossTable |
| '''Map/Location:'''
| | |NAME= Sekhmete |
| | | |IMAGE= W New Sekhmente.jpg |
| <span style="color:yellow;>Eopi</span>
| | |LINK= https://chromerivals.net/game/pedia/monster/764182736435957800 |
| | | |MAP_ANI= |
| '''Respawn Time:'''
| | |MAP_BCU= |
| | | |MAP_NEUTRAL= ATUM-2 |
| 2h
| | |RESPAWN_TIME= 7h |
| | | |PHILLON_TOKEN= yes |
| '''Drops:'''
| | |PANDEA_TOKEN= |
| | | |REVOLT_IGN_TOKEN= |
| <span style="color:#b858cc;>Phillon Token</span>
| | }} |
| | | {{BossTable |
| ='''Azimuth'''= | | |NAME= Black Widow |
| <div style="text-align: left;">
| | |IMAGE= W New Black Widow.jpg |
| [[File:Azimuth.png|400px]]
| | |LINK= https://chromerivals.net/game/pedia/monster/764280926703210500 |
| | | |MAP_ANI= Slope Port |
| <iframe key="chromerivals" path="game/pedia/monster/764273742804176900?headless=1" width="350" height="405" frameborder="0"></iframe>
| | |MAP_BCU= Orina Peninsula |
| | | |MAP_NEUTRAL= Vatallus Laboratory |
| '''Map/Location:'''
| | |RESPAWN_TIME= 6h |
| | | |PHILLON_TOKEN= |
| <span style="color:yellow;>Sector 71 Operation</span>
| | |PANDEA_TOKEN= yes |
| | | |REVOLT_IGN_TOKEN= |
| '''Respawn Time:'''
| | }} |
| | | {{BossTable |
| 6h
| | |NAME= Echelon |
| | | |IMAGE= W New Echelon.jpg |
| '''Drops:'''
| | |LINK= https://chromerivals.net/game/pedia/monster/764182736767307800 |
| | | |MAP_ANI= Portsmouth Canyon |
| <span style="color:#b858cc;>Phillon Token</span>
| | |MAP_BCU= Daisy Riverhead |
| | | |MAP_NEUTRAL= Vatallus Laboratory |
| ='''Egma Schill'''= | | |RESPAWN_TIME= 7h |
| <div style="text-align: left;">
| | |PHILLON_TOKEN= |
| [[File:Egma_Schill.png|400px]]
| | |PANDEA_TOKEN= yes |
| | | |REVOLT_IGN_TOKEN= |
| <iframe key="chromerivals" path="game/pedia/monster/763156515245805600?headless=1" width="350" height="405" frameborder="0"></iframe> | | }} |
| | | {{BossTable |
| '''Map/Location:'''
| | |NAME= Guardian of Vatallus |
| | | |IMAGE= W New Guardian of Vatallus.jpg |
| <span style="color:yellow;>Chaos</span>, <span style="color:orange;>Chaos</span>, <span style="color:cyan;>Chaos</span>
| | |LINK= https://chromerivals.net/game/pedia/monster/764182736704393200 |
| | | |MAP_ANI= |
| '''Respawn Time:'''
| | |MAP_BCU= |
| | | |MAP_NEUTRAL= Sunshine Born<br>Vatallus Laboratory |
| 6h
| | |RESPAWN_TIME= 8h |
| | | |PHILLON_TOKEN= |
| '''Drops:'''
| | |PANDEA_TOKEN= yes |
| | | |REVOLT_IGN_TOKEN= |
| <span style="color:#b858cc;>Phillon Token</span>
| | }} |
| | | {{BossTable |
| ='''Skadi'''= | | |NAME= RM-230 |
| <div style="text-align: left;">
| | |IMAGE= W New RM-230.jpg |
| [[File:Skadi.png|400px]]
| | |LINK= https://chromerivals.net/game/pedia/monster/762172289146966000 |
| | | |MAP_ANI= |
| <iframe key="chromerivals" path="game/pedia/monster/764182736305934300?headless=1" width="350" height="405" frameborder="0"></iframe>
| | |MAP_BCU= |
| | | |MAP_NEUTRAL= J-ARK Engine Room |
| '''Map/Location:'''
| | |RESPAWN_TIME= 5h |
| | | |PHILLON_TOKEN= |
| <span style="color:yellow;>Fantasy Flow</span>
| | |PANDEA_TOKEN= yes |
| | | |REVOLT_IGN_TOKEN= |
| '''Respawn Time:'''
| | }} |
| | | {{BossTable |
| 2h
| | |NAME= Eater |
| | | |IMAGE= W New Eater.jpg |
| '''Drops:'''
| | |LINK= https://chromerivals.net/game/pedia/monster/762284072566280200 |
| | | |MAP_ANI= |
| <span style="color:#b858cc;>Phillon Token</span>
| | |MAP_BCU= |
| | | |MAP_NEUTRAL= Floating Lake |
| ='''Gigantic God'''= | | |RESPAWN_TIME= 8h |
| <div style="text-align: left;">
| | |PHILLON_TOKEN= |
| [[File:Gigantic God.png|400px]]
| | |PANDEA_TOKEN= |
| | | |REVOLT_IGN_TOKEN= yes |
| <iframe key="chromerivals" path="game/pedia/monster/762916803910324200?headless=1" width="350" height="405" frameborder="0"></iframe>
| | }} |
| | | {{BossTable |
| '''Map/Location:'''
| | |NAME= Death Worm |
| | | |IMAGE= W New Death Worm.jpg |
| <span style="color:yellow;>Lumein Volcano</span>
| | |LINK= https://chromerivals.net/game/pedia/monster/762284072604028900 |
| | | |MAP_ANI= |
| '''Respawn Time:'''
| | |MAP_BCU= |
| | | |MAP_NEUTRAL= Lost Oasis |
| 8h
| | |RESPAWN_TIME= 8h |
| | | |PHILLON_TOKEN= |
| '''Drops:'''
| | |PANDEA_TOKEN= |
| | | |REVOLT_IGN_TOKEN= yes |
| <span style="color:#b858cc;>Phillon Token</span>
| | }} |
| | | {{BossTable |
| ='''Bishops'''=
| | |NAME= NGC Calcani |
| [[File:Bishop.png|400px]]
| | |IMAGE= W New NGC Calcani.jpg |
| | | |LINK= https://chromerivals.net/game/pedia/monster/762284072750829600 |
| {|
| | |MAP_ANI= |
| |+
| | |MAP_BCU= |
| |-
| | |MAP_NEUTRAL= Hazle Research Center |
| | <iframe key="chromerivals" path="game/pedia/monster/761950599683002400?headless=1" width="350" height="405" frameborder="0"></iframe> || <iframe key="chromerivals" path="game/pedia/monster/762284072524337200?headless=1" width="350" height="405" frameborder="0"></iframe> || <iframe key="chromerivals" path="game/pedia/monster/762284072817938400?headless=1" width="350" height="405" frameborder="0"></iframe>
| | |RESPAWN_TIME= 8h |
| |- | | |PHILLON_TOKEN= |
| | <iframe key="chromerivals" path="game/pedia/monster/761950599724945400?headless=1" width="350" height="405" frameborder="0"></iframe> || <iframe key="chromerivals" path="game/pedia/monster/761950599590727700?headless=1" width="350" height="405" frameborder="0"></iframe> || | | |PANDEA_TOKEN= |
| |}
| | |REVOLT_IGN_TOKEN= yes |
| | | }} |
| <div style="text-align: left;">
| | {{BossTable |
| '''Map/Location:'''
| | |NAME= Overlord-01 |
| | | |IMAGE= W New Overlord-01.jpg |
| <span style="color:yellow;>G-ARK</span>
| | |LINK= https://chromerivals.net/game/pedia/monster/762284072692109300 |
| | | |MAP_ANI= |
| '''Respawn Time:'''
| | |MAP_BCU= |
| | | |MAP_NEUTRAL= Hazle Research Center |
| 6h
| | |RESPAWN_TIME= 8h |
| | | |PHILLON_TOKEN= |
| '''Drops:'''
| | |PANDEA_TOKEN= |
| | | |REVOLT_IGN_TOKEN= yes |
| <span style="color:#b858cc;>Phillon Token</span>
| | }} |
| | | {{BossTable |
| ='''Sekhmete'''=
| | |NAME= Saleos |
| <div style="text-align: left;">
| | |IMAGE= W New Saleos.jpg |
| [[File:Sekhmete.png|400px]]
| | |LINK= https://chromerivals.net/game/pedia/monster/762284072889241600 |
| | | |MAP_ANI= |
| <iframe key="chromerivals" path="game/pedia/monster/764182736435957800?headless=1" width="350" height="405" frameborder="0"></iframe>
| | |MAP_BCU= |
| | | |MAP_NEUTRAL= Violet Cave |
| '''Map/Location:'''
| | |RESPAWN_TIME= 8h |
| | | |PHILLON_TOKEN= |
| <span style="color:yellow;>ATUM-2</span>
| | |PANDEA_TOKEN= |
| | | |REVOLT_IGN_TOKEN= <span title="No one likes this boss am I right? Imo it's easy to kill with needle.";>yes</span> |
| '''Respawn Time:'''
| | }} |
| | | {{BossTable |
| 7h
| | |NAME= Tetzlica |
| | | |IMAGE= W New Tetzlica.jpg |
| '''Drops:'''
| | |LINK= https://chromerivals.net/game/pedia/monster/762284072956350500 |
| | | |MAP_ANI= |
| <span style="color:#b858cc;>Phillon Token</span>
| | |MAP_BCU= |
| | | |MAP_NEUTRAL= Mirny Stope |
| ='''Black Widow'''=
| | |RESPAWN_TIME= 8h |
| <div style="text-align: left;">
| | |PHILLON_TOKEN= |
| [[File:Black Widow.png|400px]]
| | |PANDEA_TOKEN= |
| | | |REVOLT_IGN_TOKEN= yes |
| <iframe key="chromerivals" path="game/pedia/monster/764280926703210500?headless=1" width="350" height="405" frameborder="0"></iframe>
| | }} |
| | | {{BossTable |
| '''Map/Location:'''
| | |NAME= Overhead Completion |
| | | |IMAGE= W New Overhead Completion.jpg |
| <span style="color:orange;>Orina Peninsula</span>, <span style="color:cyan;>Slope Port</span>, <span style="color:yellow;>Vatallus Laboratory</span>
| | |LINK= https://chromerivals.net/game/pedia/monster/762284073019265000 |
| | | |MAP_ANI= |
| '''Respawn Time:'''
| | |MAP_BCU= |
| | | |MAP_NEUTRAL= Eldorado Metropolis |
| 6h
| | |RESPAWN_TIME= 8h |
| | | |PHILLON_TOKEN= |
| '''Drops:'''
| | |PANDEA_TOKEN= |
| | | |REVOLT_IGN_TOKEN= yes |
| <span style="color:#cbcbcb;>Pandea Token</span>
| | }} |
| | | {{BossTable |
| ='''Echelon'''=
| | |NAME= Lord Kreacia |
| <div style="text-align: left;">
| | |IMAGE= W New Lord Kreacia.jpg |
| [[File:Echelon.png|400px]]
| | |LINK= https://chromerivals.net/game/pedia/monster/762172820695306200 |
| | | |MAP_ANI= Dragon Lair |
| <iframe key="chromerivals" path="game/pedia/monster/764182736767307800?headless=1" width="350" height="405" frameborder="0"></iframe>
| | |MAP_BCU= Dragon Lair |
| | | |MAP_NEUTRAL= |
| '''Map/Location:'''
| | |RESPAWN_TIME= 9h |
| | | |PHILLON_TOKEN= yes |
| <span style="color:orange;>Daisy Riverhead</span>, <span style="color:cyan;>Portsmouth Canyon</span>, <span style="color:yellow;>Vatallus Laboratory</span>
| | |PANDEA_TOKEN= yes |
| | | |REVOLT_IGN_TOKEN= yes |
| '''Respawn Time:'''
| | }} |
| | | {{BossTable |
| 7h
| | |NAME= Calamity |
| | | |IMAGE= W New Calamity.jpg |
| '''Drops:'''
| | |LINK= https://chromerivals.net/game/pedia/monster/895650918194761728 |
| | | |MAP_ANI= |
| <span style="color:#cbcbcb;>Pandea Token</span>
| | |MAP_BCU= |
| | | |MAP_NEUTRAL= Ash Lane |
| ='''Guardian of Vatallus'''=
| | |RESPAWN_TIME= |
| <div style="text-align: left;">
| | |RESPAWN_TIME_CRYSTAL= On specific Crystals combination. |
| [[File:Guardian of Vatallus.png|400px]]
| | |PHILLON_TOKEN= |
| | | |PANDEA_TOKEN= |
| <iframe key="chromerivals" path="game/pedia/monster/764182736704393200?headless=1" width="350" height="405" frameborder="0"></iframe>
| | |REVOLT_IGN_TOKEN= Event Items |
| | | }} |
| '''Map/Location:'''
| | <!-- INSERT NEW BOSSES ADDED HERE -------------------------------------------------- --> |
| | | {{BossTable |
| <span style="color:yellow;>Sunshine Born</span>, <span style="color:yellow;>Vatallus Laboratory</span>
| | |NAME= NGC Mothership |
| | | |IMAGE= W New NGC Mothership.jpg |
| '''Respawn Time:'''
| | |LINK= https://chromerivals.net/game/pedia/monster/762284072637583400 |
| | | |MAP_ANI= |
| 8h
| | |MAP_BCU= |
| | | |MAP_NEUTRAL= NGC Marine Laboratory |
| '''Drops:'''
| | |RESPAWN_TIME= 24h |
| | | |PHILLON_TOKEN= |
| <span style="color:#cbcbcb;>Pandea Token</span>
| | |PANDEA_TOKEN= |
| | | |REVOLT_IGN_TOKEN= yes |
| ='''RM-230'''=
| | }} |
| <div style="text-align: left;">
| | {{BossTable |
| [[File:RM-230.png|400px]]
| | |NAME= NGC Strategic Point |
| | | |IMAGE= W New NGC Strategic Point.jpg |
| <iframe key="chromerivals" path="game/pedia/monster/762172289146966000?headless=1" width="350" height="405" frameborder="0"></iframe>
| | |LINK= https://chromerivals.net/game/pedia/monster/767355598571327500 |
| | | |MAP_ANI= |
| '''Map/Location:'''
| | |MAP_BCU= |
| | | |MAP_NEUTRAL= Floating Lake<br>Hazle Research Center<br>Violet Cave |
| <span style="color:yellow;>J-ARK Engine Room</span>
| | |RESPAWN_TIME= 35h |
| | | |PHILLON_TOKEN= |
| '''Respawn Time:'''
| | |PANDEA_TOKEN= |
| | | |REVOLT_IGN_TOKEN= 20k War Points |
| 5h
| | }} |
| | | </div> |
| '''Drops:'''
| | <br> |
| | | <br> |
| <span style="color:#cbcbcb;>Pandea Token</span>
| | See also: [[Crystals]]. |
| | |
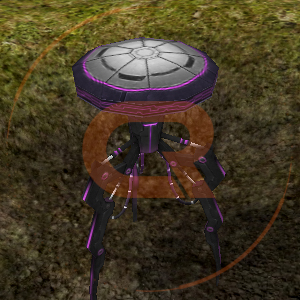
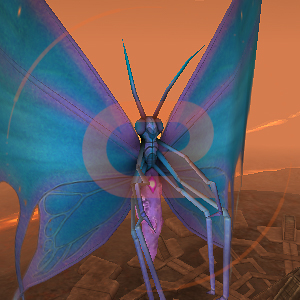
| ='''Eater'''=
| |
| <div style="text-align: left;">
| |
| [[File:Eater.png|400px]]
| |
| | |
| <iframe key="chromerivals" path="game/pedia/monster/762284072566280200?headless=1" width="350" height="405" frameborder="0"></iframe>
| |
| | |
| '''Map/Location:'''
| |
| | |
| <span style="color:yellow;>Floating Lake</span>
| |
| | |
| '''Respawn Time:'''
| |
| | |
| 8h
| |
| | |
| '''Drops:'''
| |
| | |
| <span style="color:#7cdcce;>Revolt Ignition Token</span>
| |
| | |
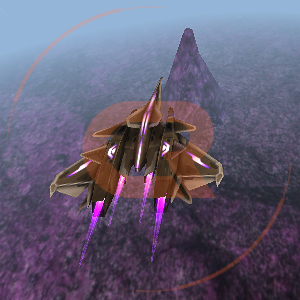
| ='''Death Worm'''=
| |
| <div style="text-align: left;">
| |
| [[File:Death Worm.png|400px]]
| |
| | |
| <iframe key="chromerivals" path="game/pedia/monster/762284072604028900?headless=1" width="350" height="405" frameborder="0"></iframe>
| |
| | |
| '''Map/Location:'''
| |
| | |
| <span style="color:yellow;>Lost Oasis</span>
| |
| | |
| '''Respawn Time:'''
| |
| | |
| 8h
| |
| | |
| '''Drops:'''
| |
| | |
| <span style="color:#7cdcce;>Revolt Ignition Token</span>
| |
| | |
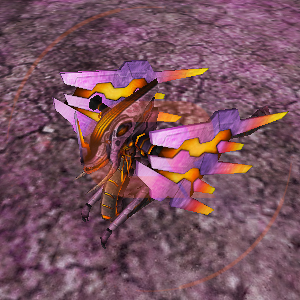
| ='''NGC Calcani'''=
| |
| <div style="text-align: left;">
| |
| [[File:NGC Calcani.png|400px]]
| |
| | |
| <iframe key="chromerivals" path="game/pedia/monster/762284072750829600?headless=1" width="350" height="405" frameborder="0"></iframe>
| |
| | |
| '''Map/Location:'''
| |
| | |
| <span style="color:yellow;>Hazle Research Center</span>
| |
| | |
| '''Respawn Time:'''
| |
| | |
| 8h
| |
| | |
| '''Drops:'''
| |
| | |
| <span style="color:#7cdcce;>Revolt Ignition Token</span>
| |
| | |
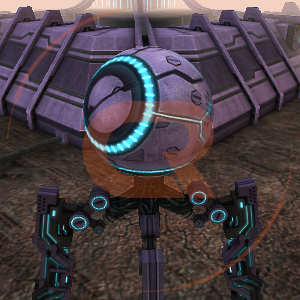
| ='''Overlord-01'''=
| |
| <div style="text-align: left;">
| |
| [[File:Overlord-01.png|400px]]
| |
| | |
| <iframe key="chromerivals" path="game/pedia/monster/762284072692109300?headless=1" width="350" height="405" frameborder="0"></iframe>
| |
| | |
| '''Map/Location:'''
| |
| | |
| <span style="color:yellow;>Hazle Research Center</span>
| |
| | |
| '''Respawn Time:'''
| |
| | |
| 8h
| |
| | |
| '''Drops:'''
| |
| | |
| <span style="color:#7cdcce;>Revolt Ignition Token</span>
| |
| | |
| ='''Saleos'''=
| |
| <div style="text-align: left;">
| |
| [[File:Saleos.png]]
| |
| | |
| <iframe key="chromerivals" path="game/pedia/monster/762284072889241600?headless=1" width="350" height="405" frameborder="0"></iframe>
| |
| | |
| '''Map/Location:'''
| |
| | |
| <span style="color:yellow;>Violet Cave</span>
| |
| | |
| '''Respawn Time:'''
| |
| | |
| 8h
| |
| | |
| '''Drops:'''
| |
| | |
| <span title="No one likes this boss am I right? Imo it's easy to kill with needle.";><span style="color:#7cdcce;>Revolt Ignition Token</span></span>
| |
| | |
| ='''Tetzlica'''=
| |
| <div style="text-align: left;">
| |
| [[File:Tetzlica.png|400px]]
| |
| | |
| <iframe key="chromerivals" path="game/pedia/monster/762284072956350500?headless=1" width="350" height="405" frameborder="0"></iframe>
| |
| | |
| '''Map/Location:'''
| |
| | |
| <span style="color:yellow;>Mirny Stope</span>
| |
| | |
| '''Respawn Time:'''
| |
| | |
| 8h
| |
| | |
| '''Drops:'''
| |
| | |
| <span style="color:#7cdcce;>Revolt Ignition Token</span>
| |
| | |
| ='''Overhead Completion'''=
| |
| <div style="text-align: left;">
| |
| [[File:Overhead Completion.png|400px]]
| |
| | |
| <iframe key="chromerivals" path="game/pedia/monster/762284073019265000?headless=1" width="350" height="405" frameborder="0"></iframe>
| |
| | |
| '''Map/Location:'''
| |
| | |
| <span style="color:yellow;>Eldorado Metropolis</span>
| |
| | |
| '''Respawn Time:'''
| |
| | |
| 8h
| |
| | |
| '''Drops:'''
| |
| | |
| <span style="color:#7cdcce;>Revolt Ignition Token</span>
| |
| | |
| ='''Lord Kreacia'''=
| |
| <div style="text-align: left;">
| |
| [[File:Lord Kreacia.png|400px]]
| |
| | |
| <iframe key="chromerivals" path="game/pedia/monster/762172820695306200?headless=1" width="350" height="405" frameborder="0"></iframe>
| |
| | |
| '''Map/Location:'''
| |
| | |
| <span style="color:orange;>Dragon Lair</span>, <span style="color:cyan;>Dragon Lair</span>
| |
| | |
| '''Respawn time:'''
| |
| | |
| 9h
| |
| | |
| '''Drops:'''
| |
| | |
| <span style="color:#b858cc;>Phillon Token</span>, <span style="color:#cbcbcb;>Pandea Token</span>, <span style="color:#7cdcce;>Revolt Ignition Token</span>
| |
| | |
| ='''Calamity'''=
| |
| <div style="text-align: left;">
| |
| [[File:Calamity.png|400px]]
| |
| | |
| <iframe key="chromerivals" path="/game/pedia/monster/895650918194761728?headless=1" width="350" height="405" frameborder="0"></iframe>
| |
| | |
| '''Map/Location:'''
| |
| | |
| <span style="color:yellow;>Ash Lane</span>
| |
| | |
| '''Respawn time:'''
| |
| | |
| On specific [[Crystals]] combination.
| |
| | |
| '''Drops:'''
| |
| | |
| Event Items
| |
| | |
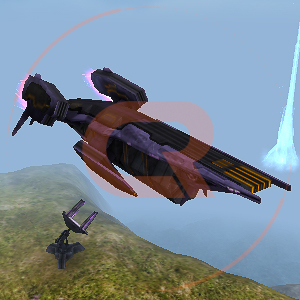
| ='''NGC Mothership'''=
| |
| <div style="text-align: left;">
| |
| [[File:NGC MS.png|500px]]
| |
| | |
| <iframe key="chromerivals" path="game/pedia/monster/762284072637583400?headless=1" width="350" height="405" frameborder="0"></iframe>
| |
| | |
| '''Map/Location:'''
| |
| | |
| <span style="color:yellow;>NGC Marine Laboratory</span>
| |
| | |
| '''Respawn Time:'''
| |
| | |
| 24h
| |
| | |
| '''Drops:'''
| |
| | |
| <span style="color:#7cdcce;>Revolt Ignition Token</span>
| |
| | |
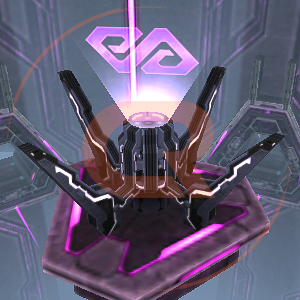
| ='''NGC Strategic Point'''=
| |
| <div style="text-align: left;">
| |
| [[File:Floating_Lake_NGC_SP.png|x400px|NGC Strategic Point in Floating Lake]]
| |
| [[File:Hazle_NGC_SP.png|x400px|NGC Strategic Point in Hazle Research Center]]
| |
| [[File:Violet_Cave_NGC_SP.png|400px|NGC Strategic Point in Violet Cave]]
| |
| | |
| <iframe key="chromerivals" path="game/pedia/monster/767355598571327500?headless=1" width="350" height="405" frameborder="0"></iframe>
| |
| | |
| Additional drop: 20k War Points
| |
| | |
| '''Map/Location:'''
| |
| | |
| <span style="color:yellow;>Floating Lake</span>, <span style="color:yellow;>Hazle Research Center</span>, <span style="color:yellow;>Violet Cave</span>
| |
| | |
| '''Respawn Time:'''
| |
| | |
| 35h
| |